How to Draw a Sideways Nose
Nose drawing is a defining feature of the face. They can be structured in various ways that may describe their femininity or masculinity. In this tutorial, we will be drawing a female nose from an angle. We will be drawing a nose from a side-front view. It is good to learn different ways of drawing a nose, however, drawing a nose from a unique angle can help us to figure out the scale ratio defined in the foreground and background of our image. When we learn how to draw a nose from an angle, we are learning how to gain insight into depth which is a great skill to learn for drawing.
Table of Contents
- 1 Necessary Materials
- 2 Preparation
- 3 Before We Draw
- 4 The Nose from an Angle
- 4.1 Step 1: Measuring and Grid Marks
- 4.2 Step 2: Drawing the Nose with Pencil
- 4.3 Step 3: Shading with Pen
- 4.4 Tips to Remember
- 5 Frequently Asked Questions
- 5.1 How Do I Draw a Nose from an Angle?
- 5.2 How Do I Draw a Realistic Nose?
- 5.3 How Do I Draw a Feminine Nose?
Necessary Materials
We should always consider which medium will produce the best results when we tackle a drawing exercise. In this tutorial, we will be drawing a nose using a series of pens and pencils. Pen and pencil often work well in tandem with one another as the pencil can create a good layer to draw the finer details on top of a pen.
So, here is what we will need!
- A good set of pencils (Derwent Graphic Pencils Recommended)
- A Ballpoint pen
- Micron pen
- A steel ruler
- An eraser
- A sharpener
- Good paper (200 g/m – 250 g/m recommended)
- Source material (could be from your phone or a printed image)
Preparation
We want to make sure we have all these materials as each component will be important through this process of drawing. We will be drawing from the source image within this tutorial, which you can either draw directly from your phone or tablet. Whichever device you want is fine, however, using a tablet or an iPad is generally the better option especially for drawing noses, as we can zoom into the finer details.
You may also print the image out if you feel that this might be easier. With our materials and source image near and ready for use let us begin.
Before We Draw
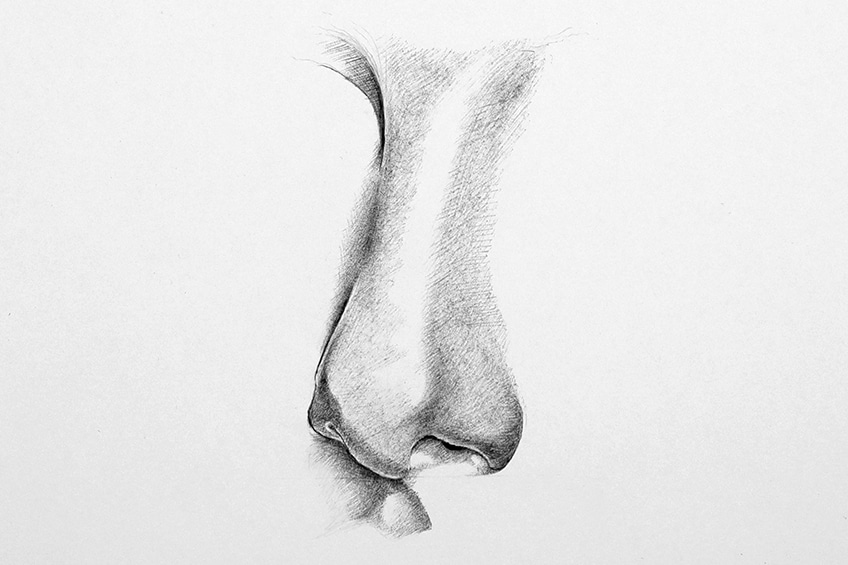
Let us take a moment to consider our source image before we begin the drawing process. Drawing noses is interesting, as the nose is subtle in the way its shadows change and form around it. This slight shadowing is often contrasted by the darkness of the nostrils. This is because the nostrils generally don't receive that much light.
This is an important concept to remember as we will develop the shadows around the nostrils.
The Nose from an Angle
This is an interesting angle to draw a nose from as it is not completely the side view and not completely the front view, it is a side-front view. Drawing the nose from an angle such as this is a great way for learning proportions as the angle describes an interesting placement of each component of a nose drawing. Lastly, when learning how to draw a nose, essentially what we focus on is developing the structure around the nostrils.
With that said, it is all doable through a few simple steps, and here is how we do it.
Step 1: Measuring and Grid Marks
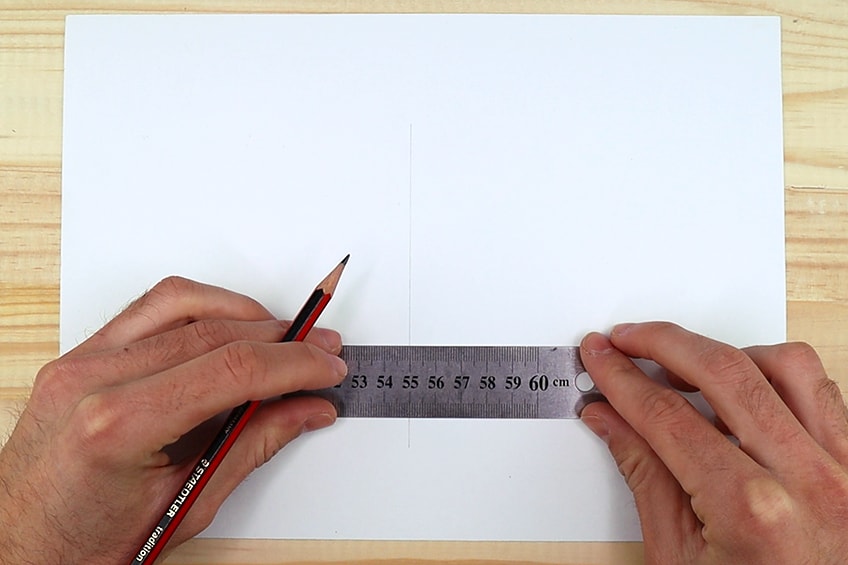
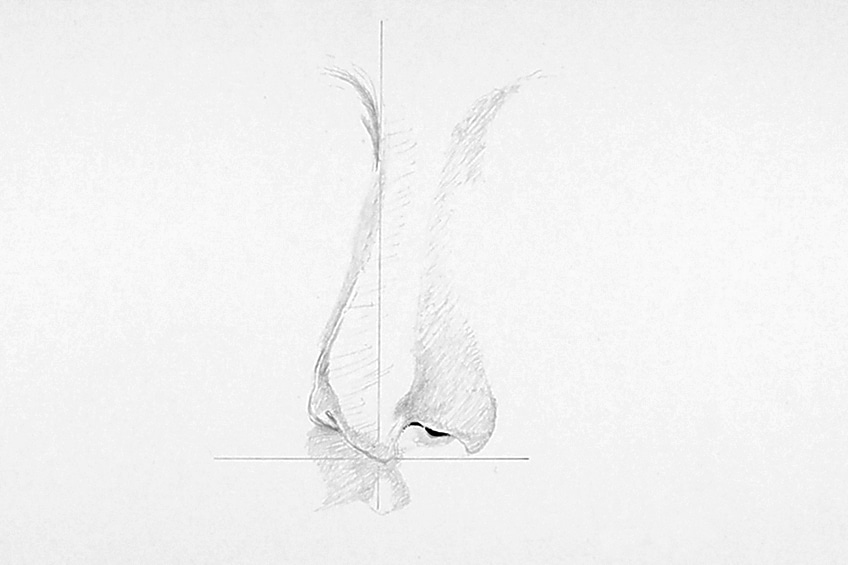
With this angle of the nose, we need to draw a vertical line down the center of our page. With your H pencil draw a vertical line in the middle of your page. Once we have done so we can also draw a horizontal line through the bottom of our vertical line.
We can find the center of the page by measuring the page both horizontally and vertically, then dividing both of those measurements in half.
Step 2: Drawing the Nose with Pencil
We developed the drawing around the nostrils with a simple nose sketch. The nose sketch is for correcting placement and proportion. With a light pencil, preferably an H pencil, begin to draw the right nostril starting from the vertical line, its inner part should touch the vertical line.
The left nostril should be in line with the right one except it should be slanting downward towards what will be the philtrum.
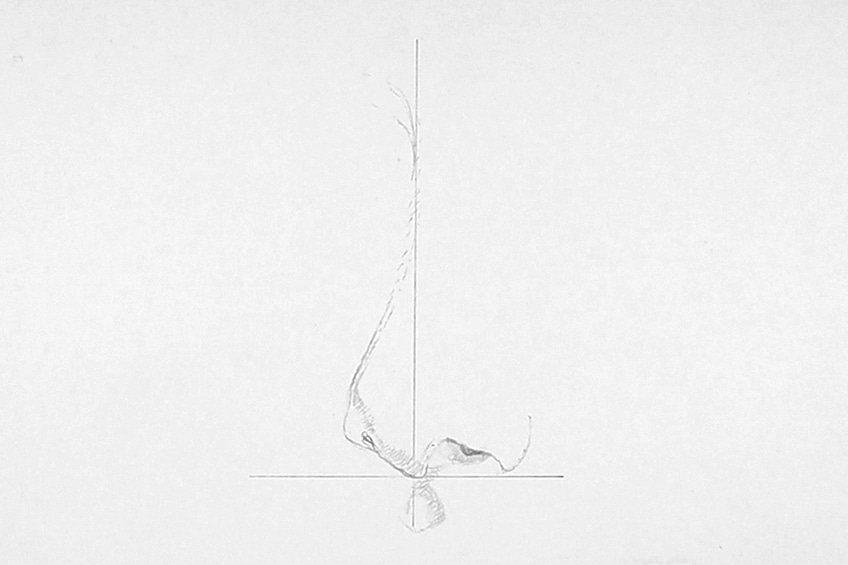
As you draw your nose sketch, constantly refer to your source image. The source image displays the right nostril as a slimline almost with the skin around it protruding out and downward. This skin curves around and up the nostril gently merging with the front of the nose.
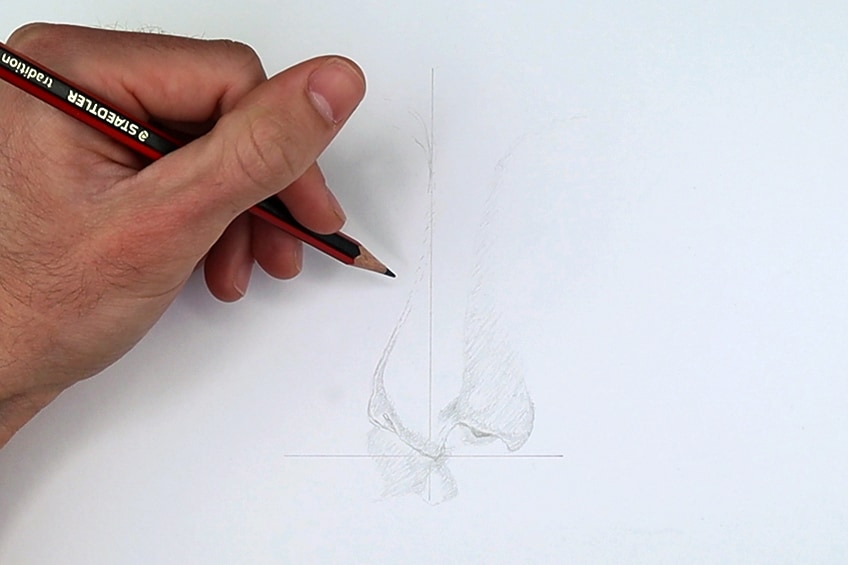
As we develop the nose sketch into a nose drawing we want to focus on the nostrils and tip of the nose. Let us begin to place slight shading marks that indicate where we will shade in further detail later on. Similar to the other nose, the darkest aspects are usually under the nose near the philtrum.
Lastly, we can begin to fill in the nostrils with our pen
Step 3: Shading with Pen
As we proceed with our nose drawing we can now begin to shade the nose with a pen. Using your ballpoint pen, begin to shade around the nostrils. We want to keep referring to our source image as we go about this process.
Be patient and keep a gentle hand as you go.
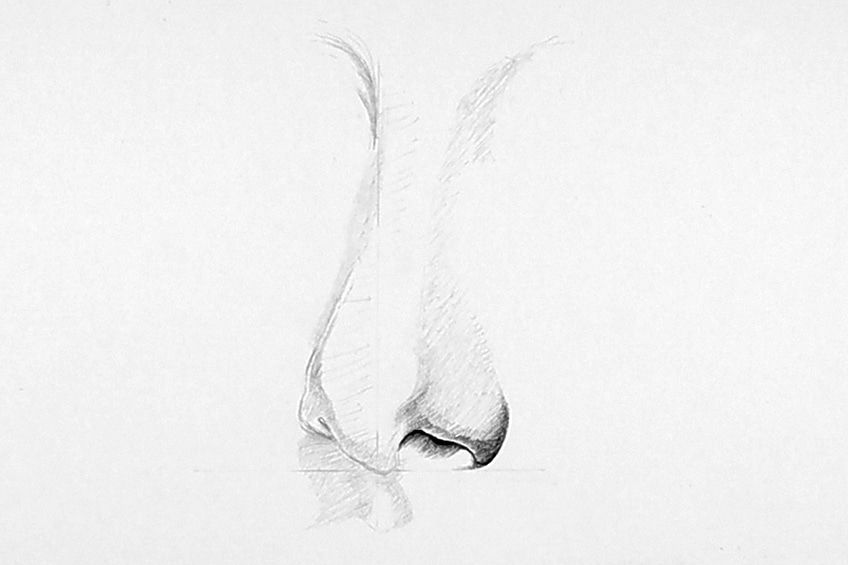
We can also shade our nose drawing near the philtrum and the lips. We want to contextualize the nose, this is why we draw the philtrum. Refer to your source image and see how the philtrum's shadows should guide the direction of your drawing.
If you hope to complete craftThe shadow placement of the philtrum should contextualize your nose drawing.
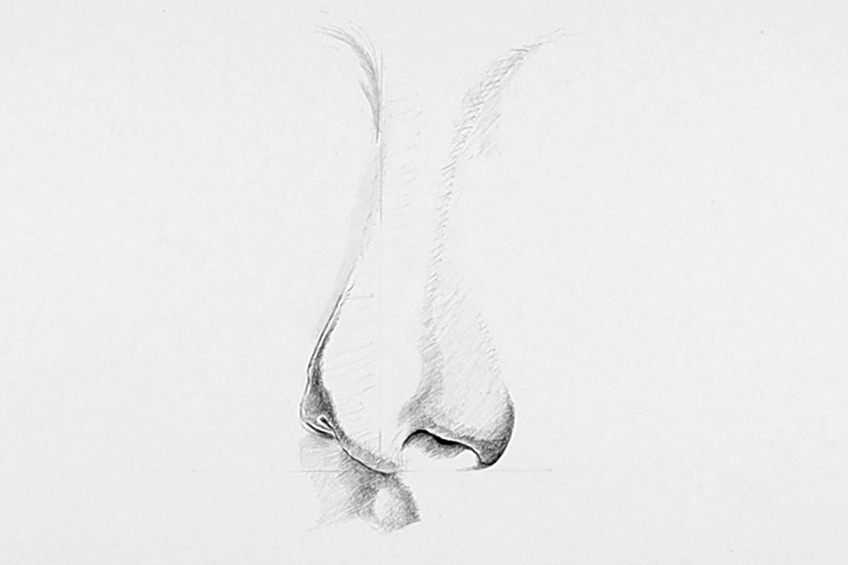
With your ballpoint pen begin to shade around the nostrils where they are the darkest, slightly applying layer over layer. This would be inside the nostril area as well. Starting with the nostrils is helpful when drawing the nose as the nostrils form the focal point of the image due to their dark tone.
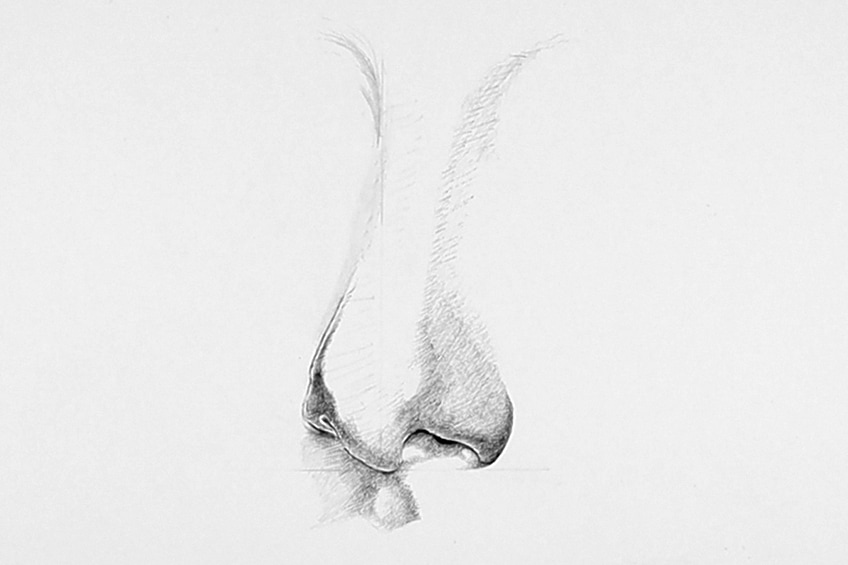
Once you have done so, take your ballpoint pen and begin shading around the nostrils, keep your pen shading light. Keep referring to your source image as you go along. As we proceed with drawing a nose, notice how the shadowing gets slightly darker on the edge of the left nostril.
This darkness moves slightly along the ridge.
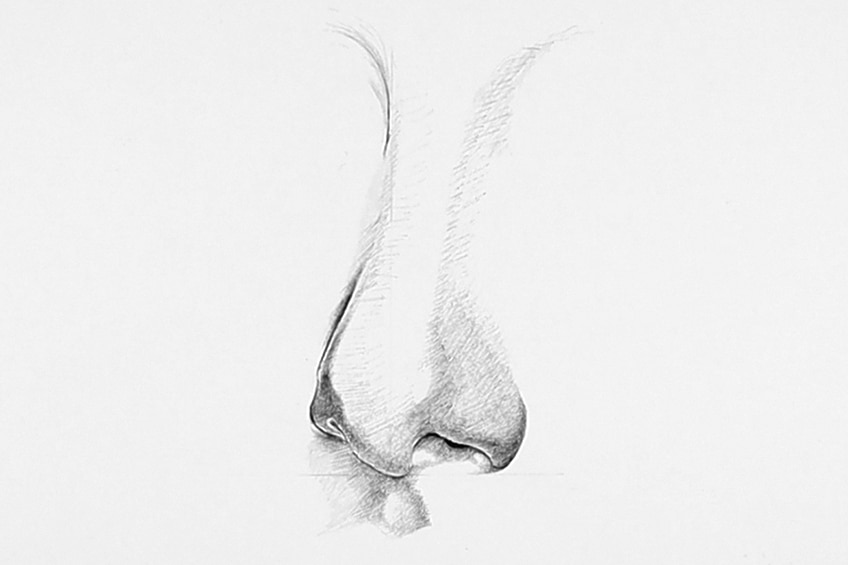
Take time referring to your source image as you go through your drawing and remember to pay attention to how the shadows flow through the nose. What I mean by this is that the tonal variation in the nose changes in different areas of the nose due to the shadows.
For instance, notice the slight shadowing behind the age of the nose which defines its depth.
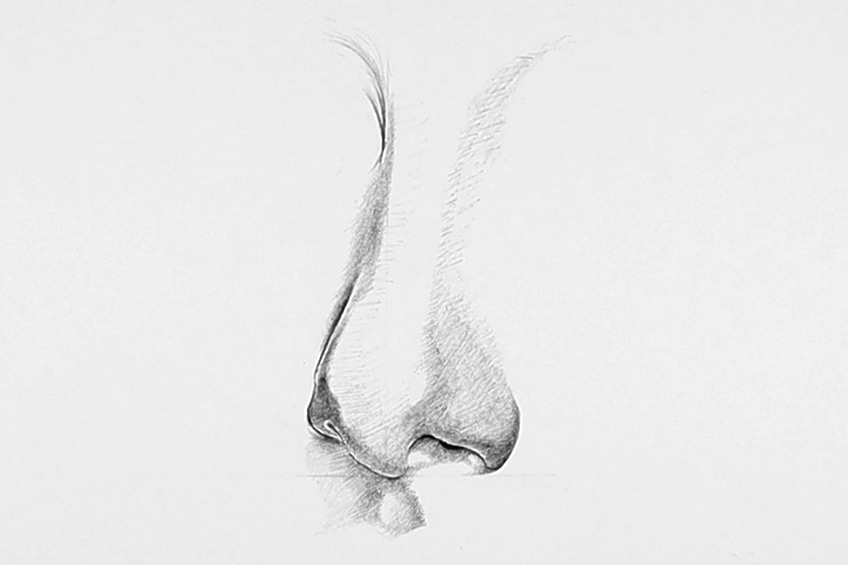
The shadows on the nose are lighter along the ridge of the nose. However, because the light source comes from the right of the image there is a slight dark lining on the edge of the nose tip. Little moments like this are what we should pay attention to as we draw.
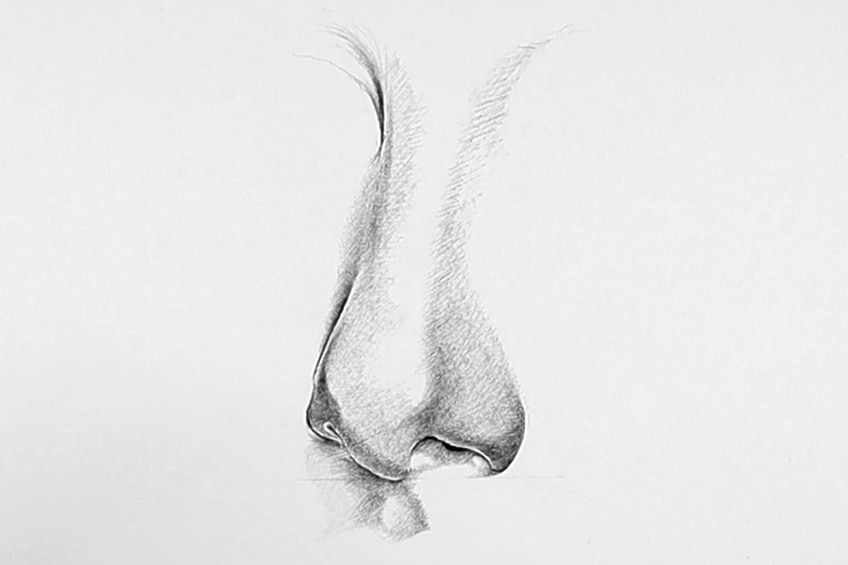
Drawing a realistic nose is about paying attention to all of the little tonal variations. These little tonal variations, between the lighter aspects on the right and the darker lining along the ridge of the nose, are details that define its depth of field.
These moments are what make a nose drawing look like a realistic nose.
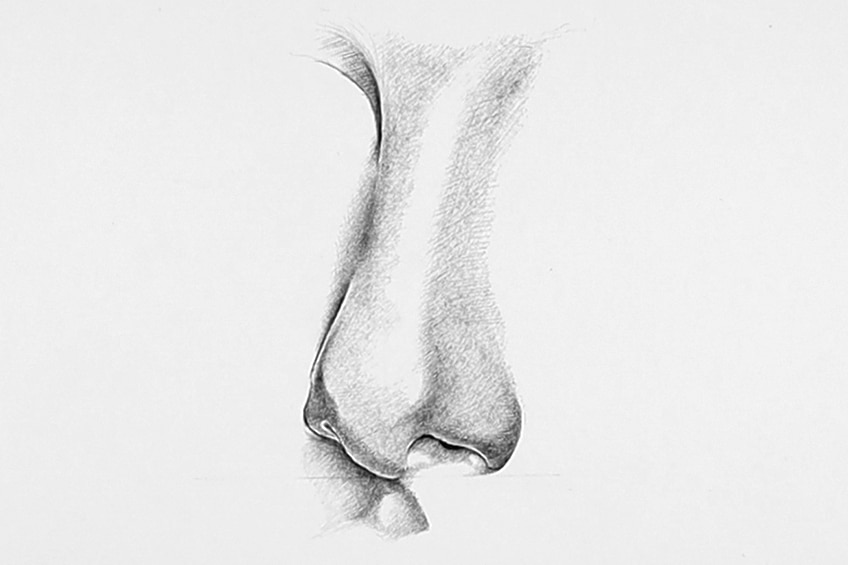
As we shade with our ballpoint pens, it is all about a constant referring to our source image and a slow process of layering shade after shade. As you go through the nose keep your hand light, especially around the ridge of the nose. The ridge is very light in its shadow formation and drifts toward a darker gradient near the bottom of the nose.
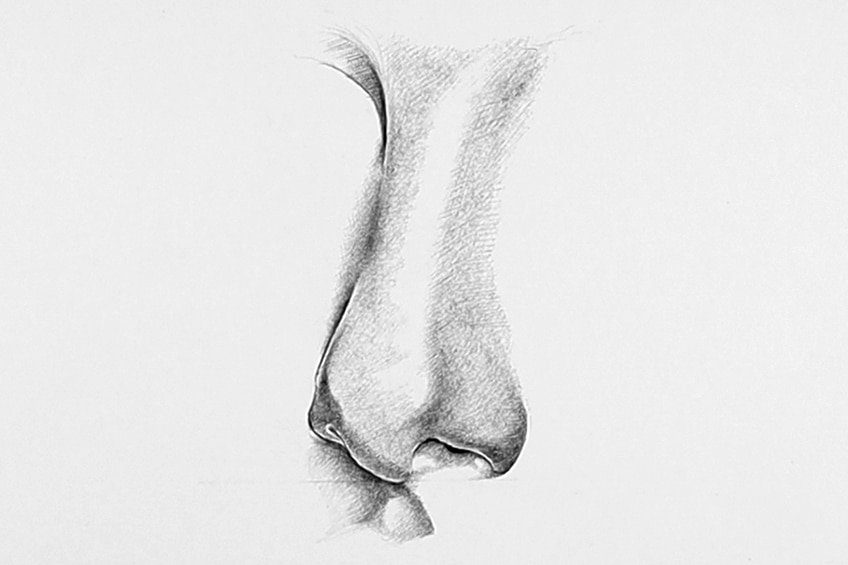
Take your time, remember to take note of where the light source is coming from, this is always a helpful tip to remember when shading. The light source is what is affecting the different variations of shadow, especially when we move from the bottom of the nose toward the top of the nose.
Those are the basic principles of how to draw a nose.
Tips to Remember
- Always identify the light source when shading as it will affect the variation of shadows in the nose.
- The form of the nose is something we want to get right before shading in pen
- When shading with a pen keep your hand light and tilted. It's a slow process of layering bit by bit.
- Compare your image to your source image constantly for correct proportioning
- Be patient, drawing takes time so remember to take each step with caution and attentiveness.
Knowing how to draw a nose is an interesting exercise. It can be quite defining of the face and often is very androgynous when decontextualized. This is why we do a nose drawing with the philtrum. Sometimes drawing can be over complicated, this tutorial is about simplifying the process of drawing a nose. We do this by focusing on something that can be achieved through a few simple steps. However, when drawing anything it is always better to take your time and be patient.
Frequently Asked Questions
How Do I Draw a Nose from an Angle?
Learning how to draw a nose is strangely simple, however, some resources overcomplicate this little member of the face. A good suggestion is to draw a single vertical line with a horizontal line through it. Use the grid to guide your proportions and distance. From there on it is all about shading correctly according to the light source and its interaction with the nose.
How Do I Draw a Realistic Nose?
Drawing a realistic anything is about understanding light. In the context of a nose drawing, the light generally falls on the nose in a way that makes the underneath portion of the nose darker in its shadow variations. These shadows generally get lighter the more they move up the nose due to greater light exposure. Light is an essential concept to understand.
How Do I Draw a Feminine Nose?
Drawing any nose out of the context of a face can be deceiving. However, if you are looking to draw a petite nose the way we do so is by paying attention to symmetry. If we make the nose more symmetrical in its structure it portrays the concept of beauty. Another way to do a nose that may seem feminine is by keeping the features simple without any protruding ridges. This gives a greater sense of elegance associated with the nose in the context of a drawing.
Source: https://artincontext.org/how-to-draw-a-nose/

0 Response to "How to Draw a Sideways Nose"
Post a Comment